Ricardo
I spent a lot of time working on Ricardo transaxle, but as with many things I changed directions and went with a sequential transaxle covered here.

Ford hired Ricardo to build a bespoke transaxle for their 2005-2006 halo car, the Ford GT. Ricardo developed a modern six-speed transaxle with advanced triple-cone synchronizers, an internal oil pump and a very high input torque rating.
The Ricardos are highly sought because they are the perfect match for an American V8 -- they can handle the power and they have the right gear ratios. When the Ford GTs first came out there was a constant stream of wrecked cars (yeah, boys will be boys) and guys building mid-engine cars were able to buy the transaxles out of the wrecks. As the Ford GT rapidly appreciated in price the supply of wrecked cars dried up and the Ricardos became very difficult to get. At this point, if a Ford GT owner needs a new transaxle they need to prove they own the car and Ford will consider selling them one. Beyond the transaxle, the starter and clutch are both expensive and hard to get.
So what did I do? I bought a new Ricardo from a race team. 18 months later, I'm stilling waiting for parts and I got to thinking, "What if it breaks? ... they will only become more rare and more expensive." So I bought it from the CEO/founder of Vencer Sarthe, a super car company located in Holland. Apparently several years ago he had purchased new ones directly from Ricardo.
I was a little worried about doing the transaction over the internet, but everything worked out great. I am having the gears REM polished, the box checked over and then broken in on a dyno. Here's some pictures.


| Gear | Gear Ratio | Final Ratio |
|---|---|---|
| First | 2.611 | 8.783 |
| Second | 1.708 | 5.746 |
| Third | 1.233 | 4.148 |
| Fourth | 0.943 | 3.172 |
| Fifth | 0.767 | 2.580 |
| Sixth | 0.625 | 2.103 |
Note that the transaxle has a final ratio of 3.364.


| Qty. | Part Number | Description | Unit Price | Ext. Price |
|---|---|---|---|---|
| 1 | M-7003-GT | Ford GT Transaxle (Ricardo) | $18,000.00 | $18,000.00 |
| 1 | n/a | Superfinish all Gears | $800.00 | $800.00 |
| 1 | M-7210-GT | Ford GT Short-Throw Shifter | $449.00 | $449.00 |
| 1 | Pressure Plate and Clutch | |||
| 1 | n/a | Custom Flywheel (Superlite Cars) | - | - |
| 1 | RCR-ADP-LS/RICARDO-01 | Custom Ricardo / LS Adapter Plate (Superlite Cars) | - | - |
| 1 | 15975 | Lakewood Pilot Bearing | $41.81 | $41.81 |
| 1 | Starter | $650.00 | $650.00 | |
| 1 | 3265-16 | Male 10 x 1.0mm Metric Convex Seat to 3AN, Steel | $8.49 | $8.49 |
| 2 | 330-2802 | ARP Flywheel Bolts, Chromoly, Black Oxide, 12-Point, 11mm x 1.5 in. | $38.97 | $77.94 |
| 2 | F5RZ-6397-C | Ford OEM Sleeve Guide (Aligns Ricardo with Adapter Plate) | $4.51 | $9.02 |
| 1 | S699 | Speed Sensor | $11.97 | $11.97 |
| 1 | T56 | Reverse Light Connector | $15.95 | $15.95 |
| 9 | -N806178-S437 | Ford OEM Bolt (Used for Clutch; 4 Pieces) | $4.42 | $39.78 |
| 1 | 308-599 | Clutch Alignment Tool for Ford GT | $49.97 | $49.97 |
| 6 | XT-75W90-QGT | Ford Premium SAE 75W-90 Synthetic Transaxle Lubricant (1 Quart) | $37.44 | $224.64 |
| 6 | M10-1.5 Medium-Strength Steel Top-Lock Distorted-Thread Locknuts—Class 8 | |||
| 6 |
|
M10 Stainless Steel Washer |
<a href="http://www.oemfordpart.com/oe-ford/sw6205">SW-6205</a>Ford Reverse Switch$44.52$44.52</p>
Starter; Two 8 mm bolts, washers, not sure of type; need gasket?
http://www.gt40s.com/forum/520181-post638.html (starter connector)
Recent post from ken regarding the starter connector: http://www.gt40s.com/forum/518343-post621.html; confirmed by Ken
Ricardo Oil System

| Qty. | Part Number | Description | Unit Price | Ext. Price |
|---|---|---|---|---|
| 1 | FSM-165 | Improved Racing High-Flow Transmission Fluid Thermostat, 165F, -8 AN Fittings | $179.00 | $179.00 |
| 1 | TBD Radiator | |||
| 1 | TBD Pressure Sensor | |||
| 1 | TBD Temperature Sensor | |||
| TBD Fittings | ||||
| 2 | TR-08-02 -08AN | RaceFlux Male to -08AN Female w/1/8" NPT Sensor Port (BOUGHT ???) | $13.90 | $27.80 |
| Aeroquip Startlite -8 Hose |
The parts are up in the air for now, here's a start:
Cooler:
Cool Tech Ford GT; -8 AN $995
Setrab coolers are a popular choice for the Ford GT
Brackets have 70A durameter dampening pads to help isolate the cooler from vibration
The port closest to the front of the car is the return. The port toward the rear is the "out".
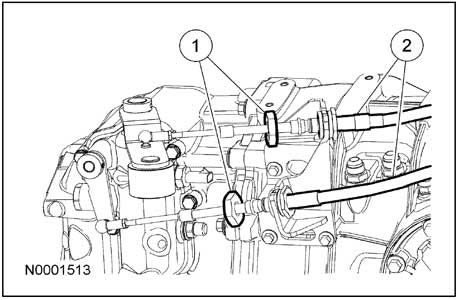
Does anyone know the thread size into the Ricardo transmission? I mean the one in the gearbox housing. I want to replace the steel AN-8 fitting with the speedflow ones.On page 2 of the Ricardo blueprints it shows the thread size as M16 X 1.5. If using the correct 8AN sized hose and fittings the Speedflow part number would be #733-08
Setrab 625?
Mounting the transaxle
At this point I want to temporarily mount the transaxle and axles so that I understand what space I have left for all of the other systems. So, I'm not going to mount the flywheel, pressure plate and clutch at this time. The first step was to mount the two sleeve guides into the transaxle. They're a tight fit and they need to be gently tapped in so as to not crack the cast aluminum lip.
Transaxle Support Plate
The support plate mounts to the top of the transaxle with six bolts. I had a mounting tab welded to it and a second another tab welded to the rear suspension cross brace.

| Qty. | Part Number | Description | Unit Price |
|---|---|---|---|
| 6 | - | M8-1.25 x 25 mm Fully-Threaded, Socket Head Screw | - |
| 6 | - | M8 Stainless Steel Washer | - |
| 1 | - | 1/2" x 1.25" AN Screw | - |
| 1 | - | 1/2" Grade 8 Washer | - |
| 1 | - | 1/2" AN Nyloc | - |
Shifting Cables
Some bulkhead seals for fuel tank:
Note the cord grips are available in a number of different body sizes and have different rubber inserts for different cable sizes. I've ordered 100s of the AL Cord Grips from elecDirect.com and have been happy with them (for work projects).
CV Joints and Axles
The constant velocity (CV) joints and axles connect the transaxle to the stub axle in the hub. The ones that come with the kit are provided by The Driveshaft Shop and are very nice:
Rated to 1,000 HP
Made of 300M alloy steel
Porsche 930-style CV joints (strong and support large driveshaft angles)
Adapters to mate the 930-style CV joints to the output flanges on the Ricardo
Cap on the left and CV joint on the right
I installed the reluctor rings for the traction control system on the CV joints. The first step was to remove the end caps which are held in place with a slight press fit and RTV (Room-Temperature-Vulcanization) silicone. It's my understanding that the silicone is used to prevent the grease from leaking out of the bolt holes. The end caps are made of thin metal, so I carefully tapped around the edge of the cap with a hammer and a large, flat screwdriver. The first one took a while. The second one went much faster because I used a much larger hammer and bigger wacks ;-)
I then scrapped the silicone from the cap and the CV joint with a razor blade taking care not to let any pieces get into the grease. I was able to get almost all of the silicone off the the CV joint and then I used acetone and a metal finishing pad to get the remainder off. The cap was a different story. Apparently RTV silicone is pretty much impervious to acetone and most other solvents. After doing a little research, I bought some Permatex 80652 RTV Silicone Dissolver. It does soften thin layers of silicone, but it's a nightmare to work with because it has a jello-like consistency. It's almost impossible to get it to adhere where you want requiring you to use ten times more than you would think necessary... it was infuriating to use and I now fully understand some of the negative reviews on Amazon. That said, it was better than not having it.
The next challenge was to mount the reluctors on the CVs. They use a friction fit and no matter what I tried I couldn't get them on. I could get one edge started, but the reluctor would be crooked and the only way to fix that was to remove it. The answer was to design and 3D print some tools. Specifically, six locating dowels (three short and three tall) and a ring driver to apply even pressure on the reluctor when hammered. The only difference between the tall and short dowels is their height. Both hold the reluctor in place and ensure that it's concentric to the CV joint. The tall dowels also help hold the ring driver in place, but they restrict where you can hit the ring driver (a taller ring driver would solve that, but would require more material). The short dowels don't cause any interference and they require much less material to print.


The process worked as follows:
Clamp the CV joint in a vice so that it is vertical (use soft jaws to prevent scratches).
Insert the three short locating dowels in the CV joint so that they form an equilateral triangle.
Insert the three tall locating dowels in the remaining holes.
Heat the reluctor to 300º F in an oven. This is hot enough to get it to expand, but not so hot as to damage the 3D-printed Onyx parts which have a heat deflection temperature of 145º C (293º F). I figured it would cool a little while being transferred from the kitchen to the garage... ahhh, I mean from my special car-part heater because I never use kitchen equipment for car stuff LOL
Twist/tap the reluctor so that its top is flush with the top of the short locating dowels. This ensures that the bottom edge of the reluctor is concentric to and just touching the CV joint.
Slide the ring driver over the tall dowels taking care to align it so that the depth gauges won't collide with any of the dowels.
Place a piece of square metal tubing on the ring driver and hammer on it until until all three depth gauges are seated on the CV joint. After every wack check to see if the reluctor is askew and wack the opposite side to straighten it if needed. I found that rocking the reluctor seemed to work better than trying to drive it straight down.
It only took a couple of minutes to do each one and everything worked like a champ!
The next step was to reinstall the caps. I used a hammer to carefully straighten the edge of the cap which had been somewhat misshaped when banging it off with the screwdriver. Once that was done, I applied Loctite 37461 Blue RTV Silicone Gasket Maker to the CV joints and gently tapped the caps on with a hammer. I immediately installed the axles so that silicone would be properly compressed before it dried. A little oozed out. I decided to mount the reluctor next to the transaxle rather than the hub because the hub bounces up and down. I may need to change this when I route the exhaust, but that's easy to do later.


Torque for the Ricardo axles is 57 ft-lbs on the adapter and axle bolts.
| Qty. | Part Number | Description | Unit Price |
|---|---|---|---|
| 2 | Driveshaft Shop SL-C 930-Style Axles | ||
| 2 | Driveshaft Shop Ricardo to 930-Style Axle Converter | ||
| 2 | Driveshaft Shop ???-Tooth Reluctor Ring | ||
| 24 | M10-1.5 x 55mm Socket Head Cap Screw | ||
| 24 | M10 Lock Washer | ||
| 12 | M10-1.5 x 25mm Socket Head Cap Screw | ||
| 12 | M10 Lock Washer |
Oil Cooler
Setrab Proline SLM Oil Coolers
53-10743 : 12.3” x 2.4” x 1.6”
53-10744 : 12.6” x 4” x 1.6”
Length: 8" to 26"
Height: 2.5" to 4"
Depth: 1.6"
Shifter
I bought the Ford GT short-throw shifter
The threads are M12 X 1.75
Need knob, 6 gears with reverse in upper left
http://www.raceseng.com/products/shift-knobs/build-your-own
Ken's Build
This picture shows the heat shield ring being fitted to the transaxle. A 6" diameter aluminum tube will be cut in half with one half for the drivers side axle shield and the other half for passenger side shield. The rings stay as shown in the picture. The 6" tube gets cut in half with one half welded to the passenger side ring and the other half welded to the drivers side ring. The only way to remove the finished heat shields would be to disconnect the axles. The shields are held in place by 4 bolts on each side.
the heat shields were a nice addition on mine. if they are long enough to extend out to the center of the CV joint, they catch the grease that could get spattered up.

