Air Jack System
A little inspiration
Yeah, I don't need an air jack system, but I've always wanted one. After doing some research and talking with "H", the chief mechanic for the Robertson Racing Team, I decided to go with a system from AP Racing. They aren't the most expensive ones, but if they're good enough for a team that podiumed at Le Mans, then they’re good enough for me. AP Racing offers three stroke options:
| Stroke | Height | Weight |
|---|---|---|
| 150 mm (5.9") | 255.5 mm (10") | 0.83 kg (1.8 pounds) |
| 230 mm (9.0") | 356.5 mm (14") | 1.07 kg (2.4 pounds) |
| 310 mm (12.2") | 456.5 mm (18") | 1.34 kg (3.0 pounds) |
Max Pressure: 30 bar (435 psi)
Lift Capacity: 675 Kg (1,488 pounds)
Body OD: 60 mm (2.36")
Mounting Ring OD: 75 mm (2.95")
I put the car on the lift and measured how far the tires hung below the chassis. The fronts were ???" and the rears were 6". For this reason I went with the 230 mm (9.0") stroke. The other decision was if I should go with built-in exhaust valves. They automatically sense when pressure is being released in the system and vent the air at the top of each cylinder rather than having it all flow through the single inflation port. This allows the car to slam down fast which is great when you have a professional pit-stop crew, but not ideal for me. In addition, it increases the size, weight and cost, so I went with the non-vented version... who said I can't be practical on this build?
Each jack lifts 675 Kg (1,488 pounds). While two could theoretically lift the car, that would be quite a balancing act. Since a triangle is more stable than a rectangle on uneven ground and three jacks have more than enough capacity, I opted for three rather than four. I located two in the rear by the engine and one in the front of the foot box.
I couldn't find anyplace that stocked them, so I ordered them from Demon Tweeks in the UK. They took several months to arrive.
There are two obvious places to locate the rear air jacks; immediately in front of the lower rear control arms or behind of the aft chassis billet uprights (i.e., the ones engraved with Superlite). Attaching them to the rear billet uprights is the easiest path, but I'm planning on significantly modifying the tail and I didn't want to add any complexity to that area. Placing them in forward of the rear control arm keeps them out of the way and moves their modest weight forward. The only downside to that location is that it requires a lot of fabrication and welding.
I contacted Hill McCarty at Agile Automotive Performance who's built multiple race SL-Cs. He used used four of the same AP Racing jacks on all of the SL-Cs he’s built and I decided to copy the approach he used to mount the rear jacks on the RMS Greenix car. He sandwiches a tube between the upper and lower mounting brackets to prevent them from deflecting. So I ordered three custom-machined aluminum tubes from him which are bored to perfectly fit the air jacks and slotted to reduced weight. Hill has been a great help and it’s nice to have an endurance-race-proven solution.
The OD of the air jack body doesn't match with any available hole saw. To obtain a good fit I considered using an under-sized hole saw and then opening it up with a sanding drum or having the brackets cut on a water jet. In the end, I bought a trepanning hole cutter (VAL CUT 2000-13) which has an infinitely adjustable arm that holds a carbide cutter. It’s capable of cutting a perfect 3/4" to 3" hole. I found that the optimal speed was faster than what the manual indicated.


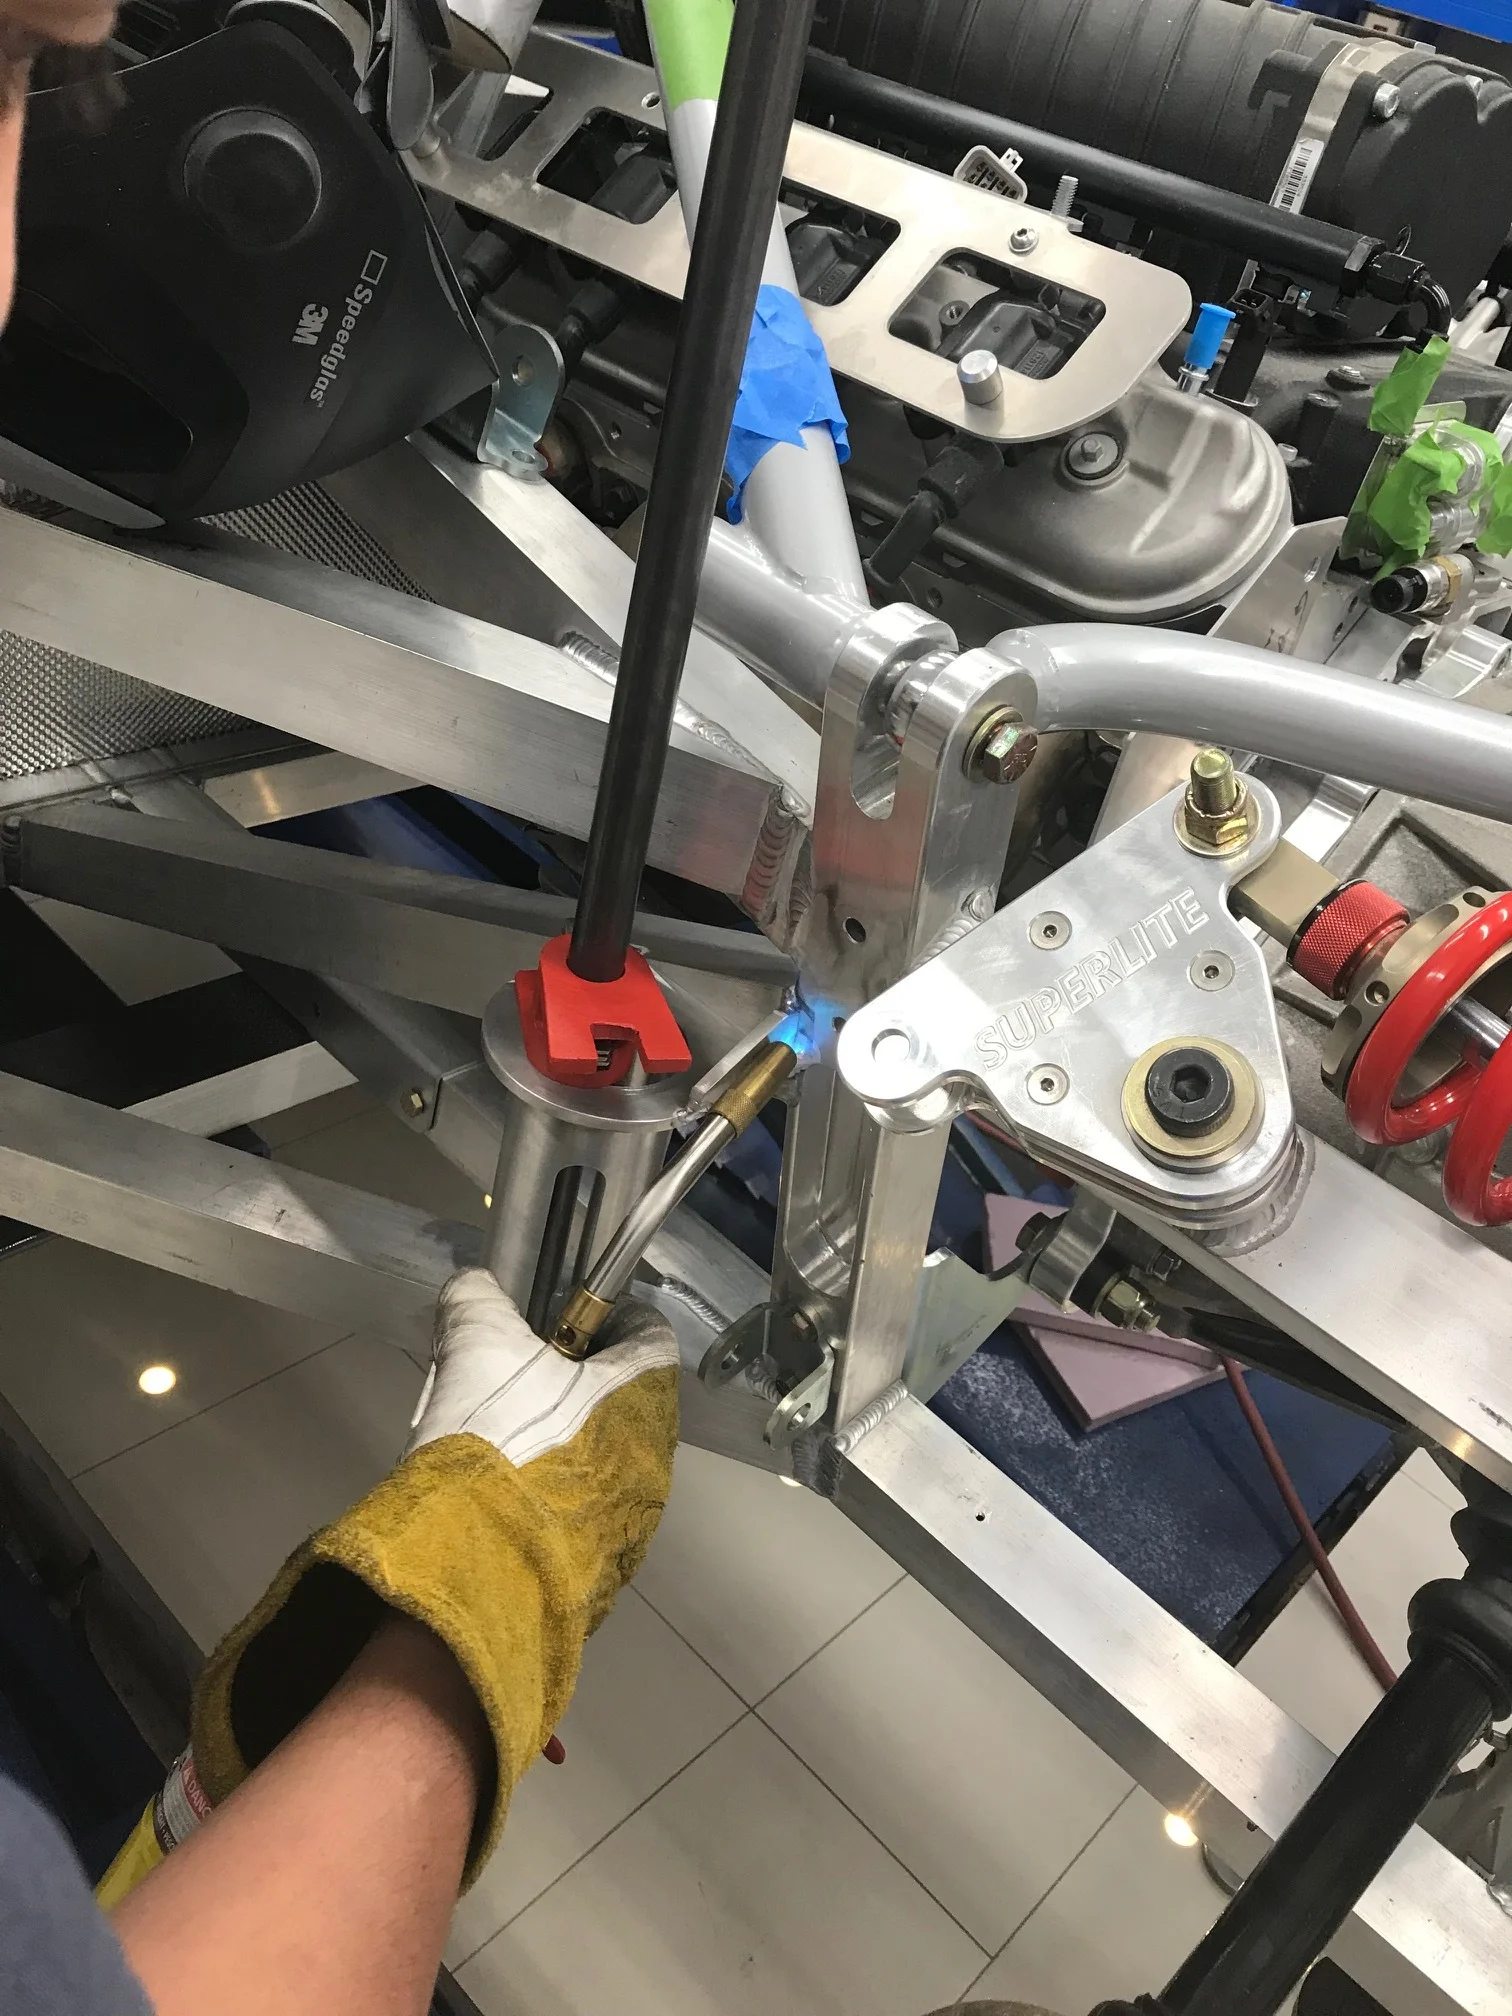
There's a lot of structural welding and you really want someone who knows what they're doing. Abe from Select Speed Shop did all of the TIG welding which maxed my garage power... 240v and 180-200 amps.
Rear Brackets
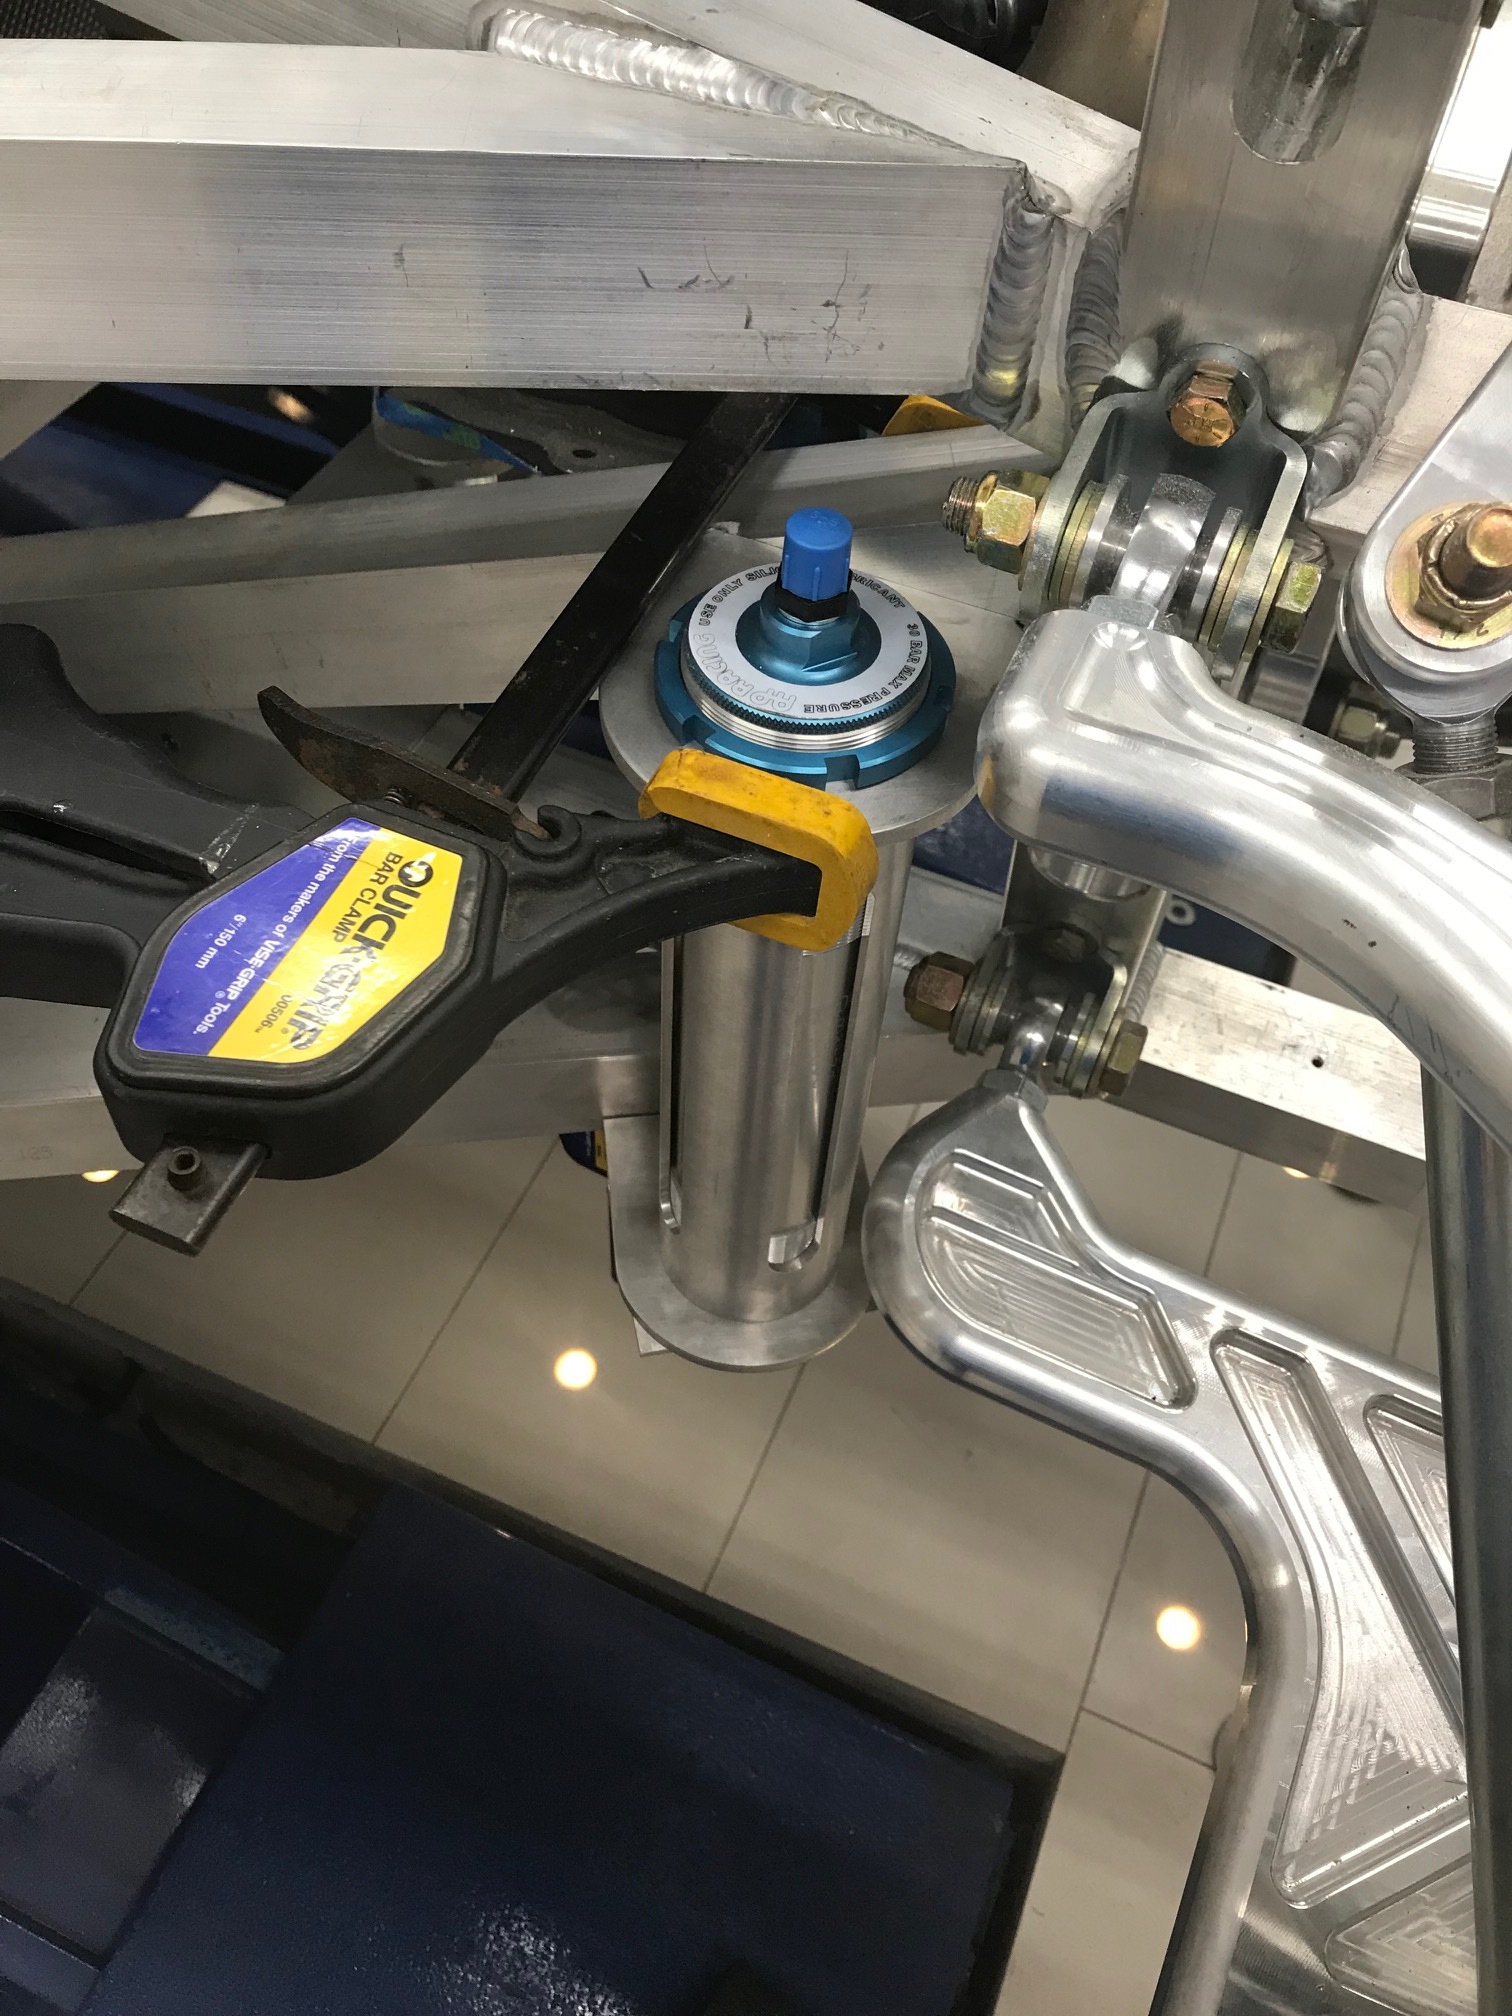
The rear brackets were made from 1/4" x 4" aluminum. Since the upper 2" x 2" tube projects about 1/4” further to the exterior than the lower 2" x 2" tube, it sets the distance of the air jack from the chassis. When fabricating the mounting plate for the upper bracket I was careful to provide enough room so that the mounting ring wouldn’t collide with the weld bead.
One of the challenges was to figure out how to hold everything in place to determine the size of the mounting plate for the bottom bracket, to ensure that everything was vertical and to keep it in place while welding. To accomplish this I fabricated a temporary bracket that was clamped to the underside of the bottom 2” x 2” — this worked better than I expected. I also fabricated a spacer to raise the bottom mounting plate up 1/8” to achieve a fillet rather than a butt weld joint. The mounting plates were tack welded with the air jacks in the tubes and their mounting rings tightened. The gussets were fabricated to span the 2” x 2”s and to extend to the middle of the mounting hole. The edges of the gussets overlap the mounting plate by 50% (i.e., 1/8”) to create a edge joint rather than a butt joint.
To prepare for final welding, I removed the air jack so that it wouldn’t be damaged by the heat. A pipe clamp was used to replace the tension on the tube created by the air jack’s mounting rings. Finally, the rear suspension was removed to provide access for welding. Abe welded everything other than the joints obstructed by the tube. The brackets are a tight fit (exactly what I wanted) and I needed a mallet to tap the tubes out to finish welding the joints that had were obstructed by the tube.


FRONT BRACKET
The front bracket was fabricated using 1/4'“ x 5” angle aluminum and 1/4” x 4” flat aluminum. The first step was to drill a small hole to locate the center of the jack in the right angle. That was used as a jig to transfer the location to the floor of the monocoque — is critical that the bracket and hole in the floor are perfectly aligned. To reduce warping the hole was trepanned after the gussets were welded. Since the trepanning cutter needs to be used in a drill press or a mill, the hole in the monocoque was drilled with a 2-3/8” hole cutter and then enlarged with a 2-3/8” sandpaper flap drum.


Mounting Ring Locks
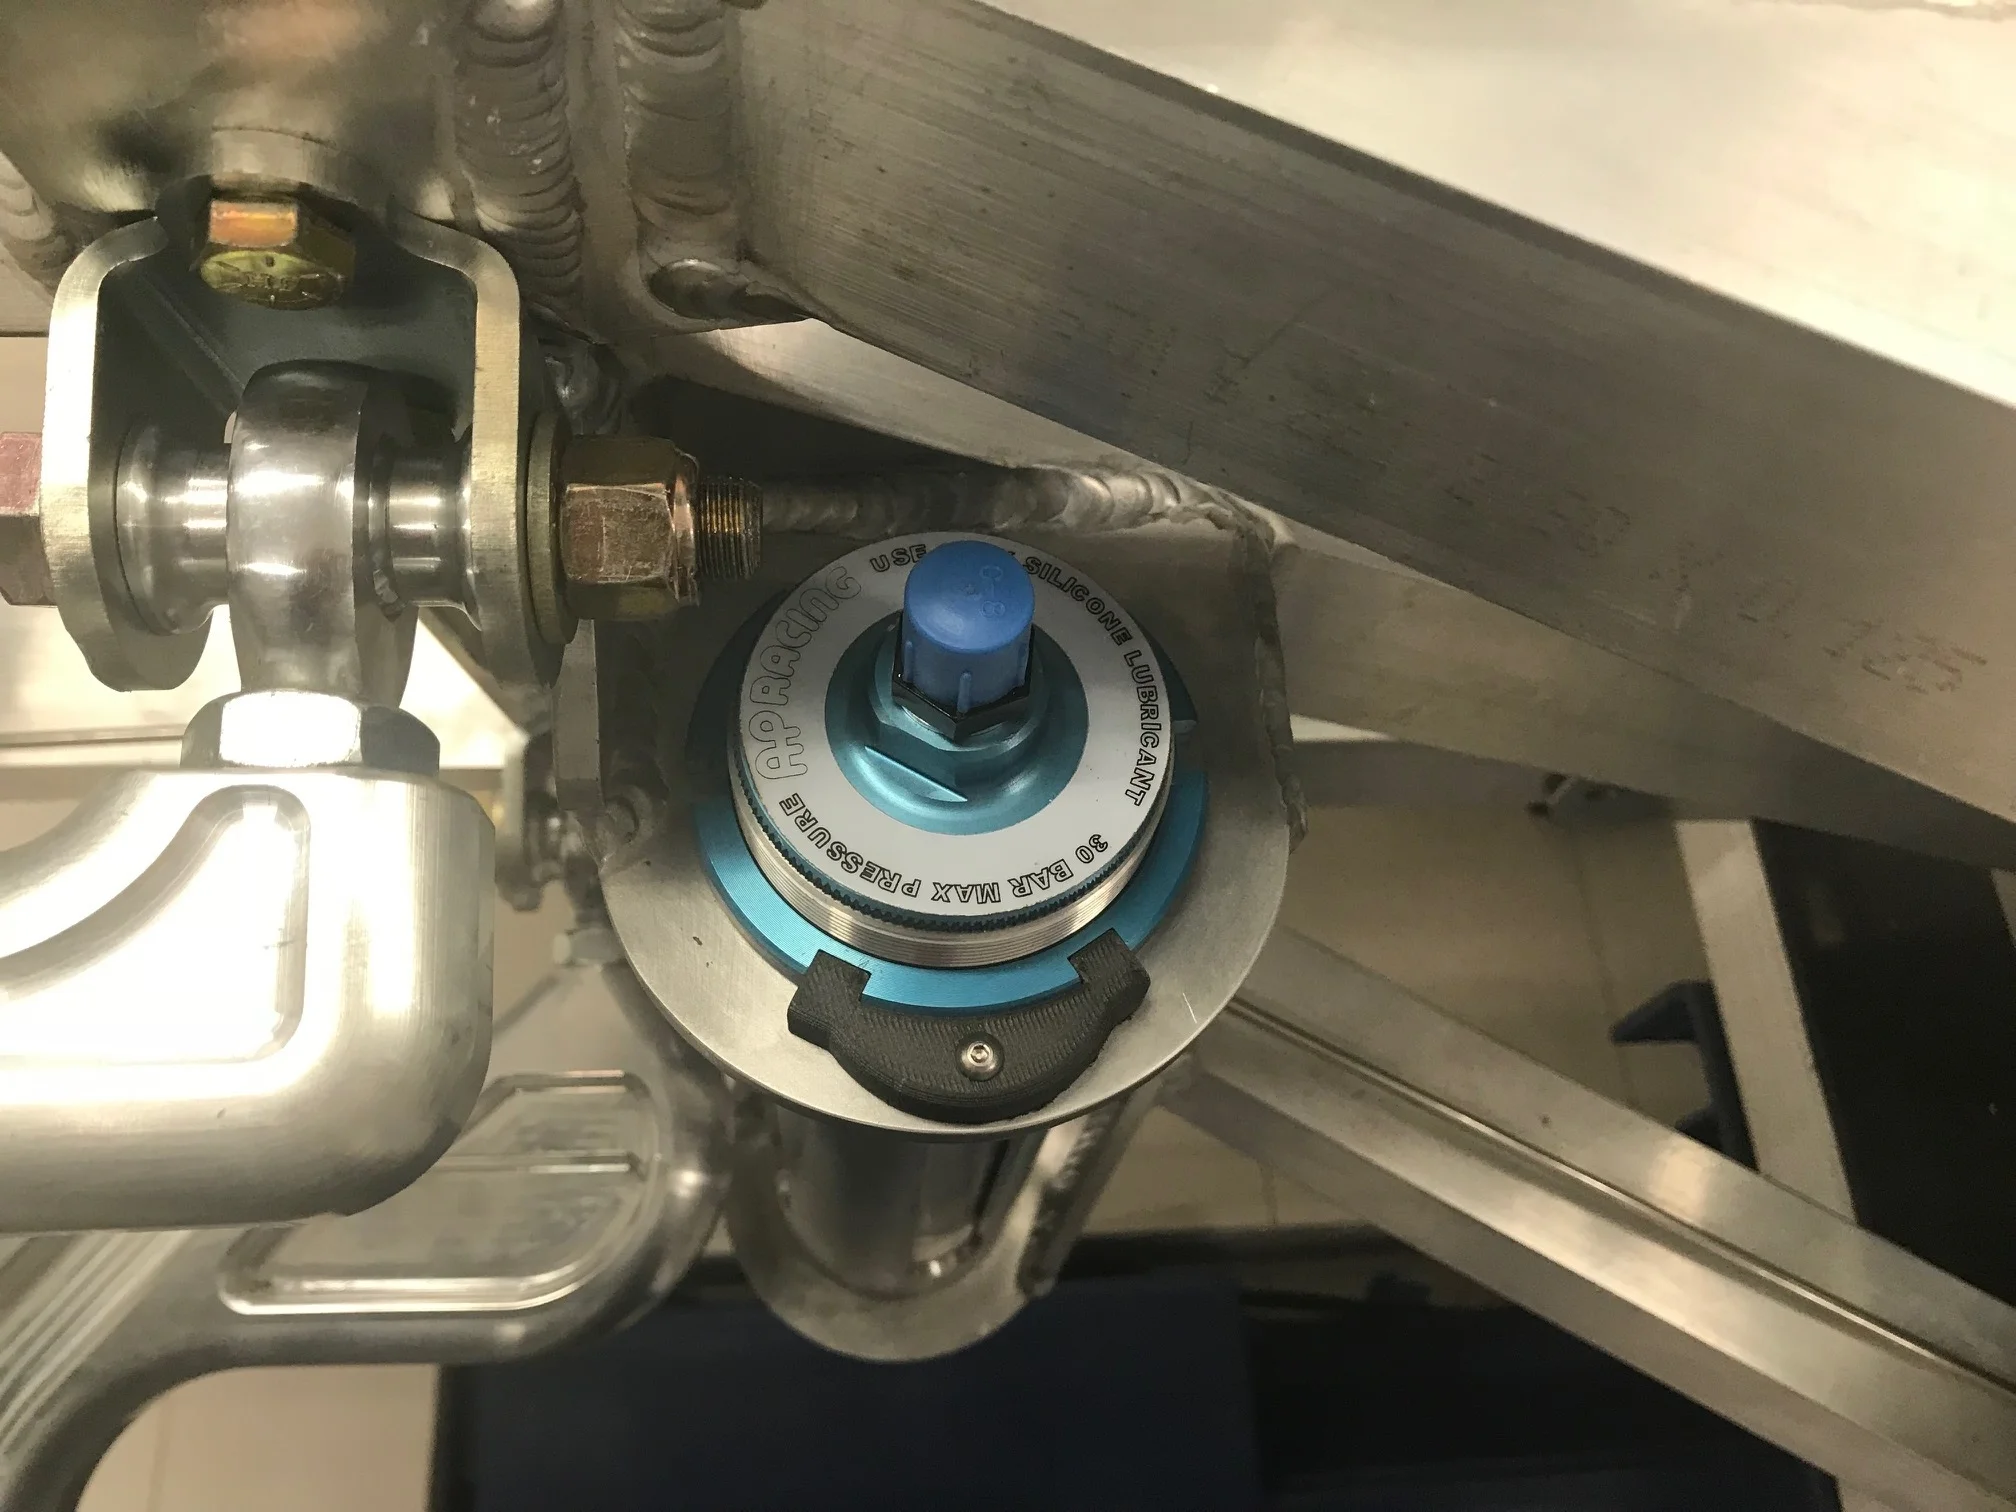
I designed and 3D printed a locking ring to prevent the air jack mounting rings from loosening. They don’t take any force so a 6-32 screw was used to keep them from rotating.
As shown in a picture above, I notched the removable floor in the nose to clear the front floor jack. I created a 360-degree lock that spans the gap between the mounting ring and the floor to reduce drag… oh, and it just happens to hide my less than perfect notch ;-)


Parts
| Qty. | Part Number | Description | Unit Price | Ext. Price |
|---|---|---|---|---|
| 3 | CP3985-230 | AP Racing Air Jack; 230 mm Stroke | $360.94 | $1,082.82 |
| 1 | CP6116-3 | AP Racing Air Jack Connector with Valve | $212.17 | $212.17 |
| 1 | CP6116-15 | AP Racing Air Jack Lance | $381.92 | $381.92 |
| 3 | n/a | Custom Billet Aluminum Structural Tube | $150.00 | $450.00 |
| -6 Aluminum Tube | ||||
| 3 | 460614-BL | Fragola Male Metric 14mm x 1.5 to -6 AN Male Adapter, Alumium,Black | $5.99 | $17.97 |
| 1 | 999214 | Fragola 14mm AN Crush Washer,Aluminum, Set of 10 | $5.99 | $5.99 |
| 1 | FBM5062 | Aeroquip Tee Adapter Fitting, -6 AN Male, Aluminum, Black | $7.19 | $7.19 |
| 1 | FBM5282 | Aeroquip Tee Adapter Fitting, -6 AN Female, -6 AN Male, -6 AN Male, Aluminum, Black | $15.29 | $15.29 |
| 1 | FBM5072 | Aeroquip Bulkhead Adapter Fitting, -6 AN, Aluminum, Black | $4.99 | $4.99 |
| 1 | FBM5100 | Aeroquip Bulkhead Nut, -6 AN, Aluminum, Black, Pair | $2.69 | $2.69 |
| 1/4" X 4" Aluminum (per Foot) | ||||
| 1 | 1/4" x 5" Aluminum Angle (per Foot) | |||
| 4 | n/a | 5/16"-18 x 1-1/4" Grade 8 Screw | n/a | n/a |
| 4 | n/z | 5/16" Grade 8 Nyloc | n/a | n/a |
| 8 | n/a | 5/16" Grade 8 Washer | n/a | n/a |
| Qty. | Part Number | Description | Unit Price | Ext. Price |
|---|---|---|---|---|
| 3 | CP3985-230 | AP Racing Air Jack; 230 mm Stroke | $360.94 | $1,082.82 |
| 1 | CP6116-3 | AP Racing Air Jack Connector with Valve | $212.17 | $212.17 |
| 1 | CP6116-15 | AP Racing Air Jack Lance | $381.92 | $381.92 |
| 3 | n/a | Custom Billet Aluminum Structural Tube | $150.00 | $450.00 |
| -6 Aluminum Tube | - | - | ||
| 3 | 460614-BL | Fragola Male Metric 14mm x 1.5 to -6 AN Male Adapter, Alumium,Black | $5.99 | $17.97 |
| 1 | 999214 | Fragola 14mm AN Crush Washer,Aluminum, Set of 10 | $5.99 | $5.99 |
| 1 | FBM5062 | Aeroquip Tee Adapter Fitting, -6 AN Male, Aluminum, Black | $7.19 | $7.19 |
| 1 | FBM5282 | Aeroquip Tee Adapter Fitting, -6 AN Female, -6 AN Male, -6 AN Male, Aluminum, Black | $15.29 | $15.29 |
| 1 | FBM5072 | Aeroquip Bulkhead Adapter Fitting, -6 AN, Aluminum, Black | $4.99 | $4.99 |
| 1 | FBM5100 | Aeroquip Bulkhead Nut, -6 AN, Aluminum, Black, Pair | $2.69 | $2.69 |
| 1/4" X 4" Aluminum (per Foot) | - | - | ||
| 1 | 1/4" x 5" Aluminum Angle (per Foot) | - | - | |
| 4 | n/a | 5/16"-18 x 1-1/4" Grade 8 Screw | - | - |
| 4 | n/z | 5/16" Grade 8 Nyloc | - | - |
| 8 | n/a | 5/16" Grade 8 Washer | - | - |
| Total | $2,181.03 |
Manifold
I machined a custom manifold that splits the air. Details can be found in this blog post.
| Qty. | Part Number | Description | Unit Price | Ext. Price |
|---|---|---|---|---|
| 3 | DP20X1.5AHSS | M20 x .5 Stainless Steel A2 Metric Allen Head Threaded Screw Plug | $5.66 | $16.98 |
| 1 | - | -6 AN Female Aluminum Weld Bung | - | - |
| 1 | - | 1-1/4" x 3" 6061 Aluminum Bar (Foot) | - | - |
Nitrogen System
| Qty. | Part Number | Description | Unit Price | Ext. Price |
|---|---|---|---|---|
| 1 | Paoli Single Trolley Kit | $2,500.00 | $2,500.00 | |
| 1 | Paoli Hose; 75 Bar, 5 Meters | $90.00 | $90.00 | |
| 1 | Paoli Air Fitting QD | $89.95 | $89.95 | |
| 1 | B.42.0056 | Paoli IO 3/8" Conico - ESA | ||
| 1 | B.42.0013 | Paoli IO 3/8" Conico | ||
| 1 | B.42.0054 | Paoli IO 1/2" 60 Degree - ESAFE | ||
| 1 | B.42.0037 | Paoli IO 1/2" 60 Degree | ||
| Total | $2,679.95 |
The trolley kit includes: F4 regulator,18-litre double-inlet bottle, belt, fixing nut, and high-pressure hose to connect the bottle to the regulator.
Jacking the Car
The following video shows the time the car was jacked. There is more information in this blog post.