I spent a lot of time thinking about the low-pressure fuel system. My primary objectives were:
- Fit everything in the space next to the fuel tank
- No "hard-turn" 90-degree bends (i.e., only swept 90s)
- Gravity feed the lift pump; pump inlet 2" lower the fuel tank outlet
- Ability to remove the filter element by removing a single hose connection
- Easy serviceability of filter, pump and all connections
- Fuel shut-off valve accessible in engine compartment
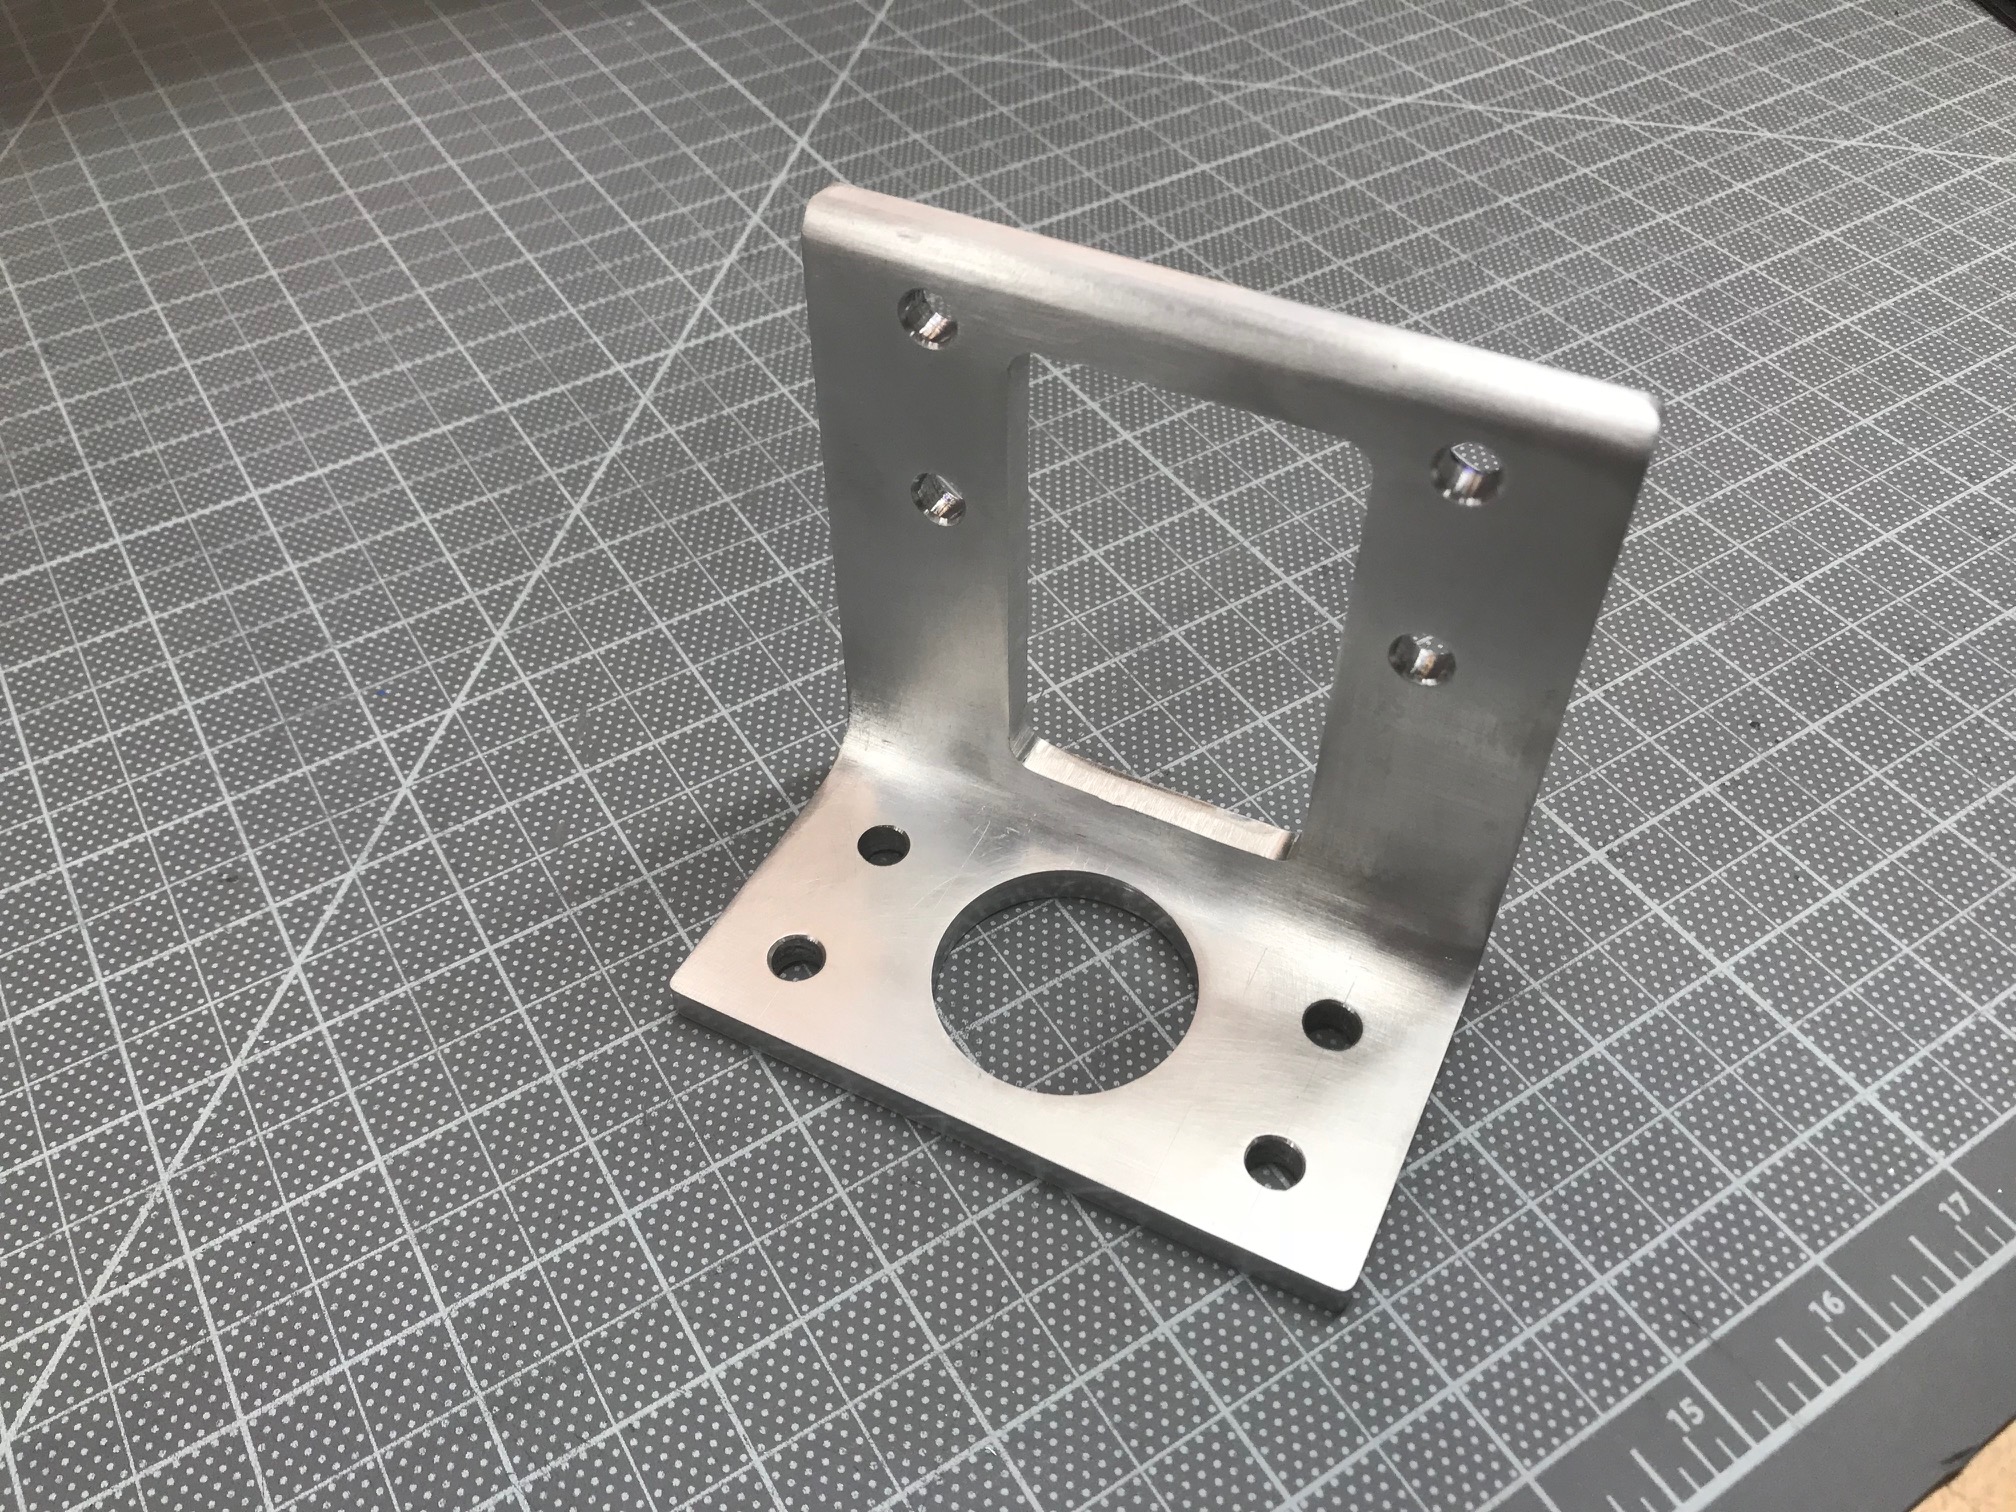
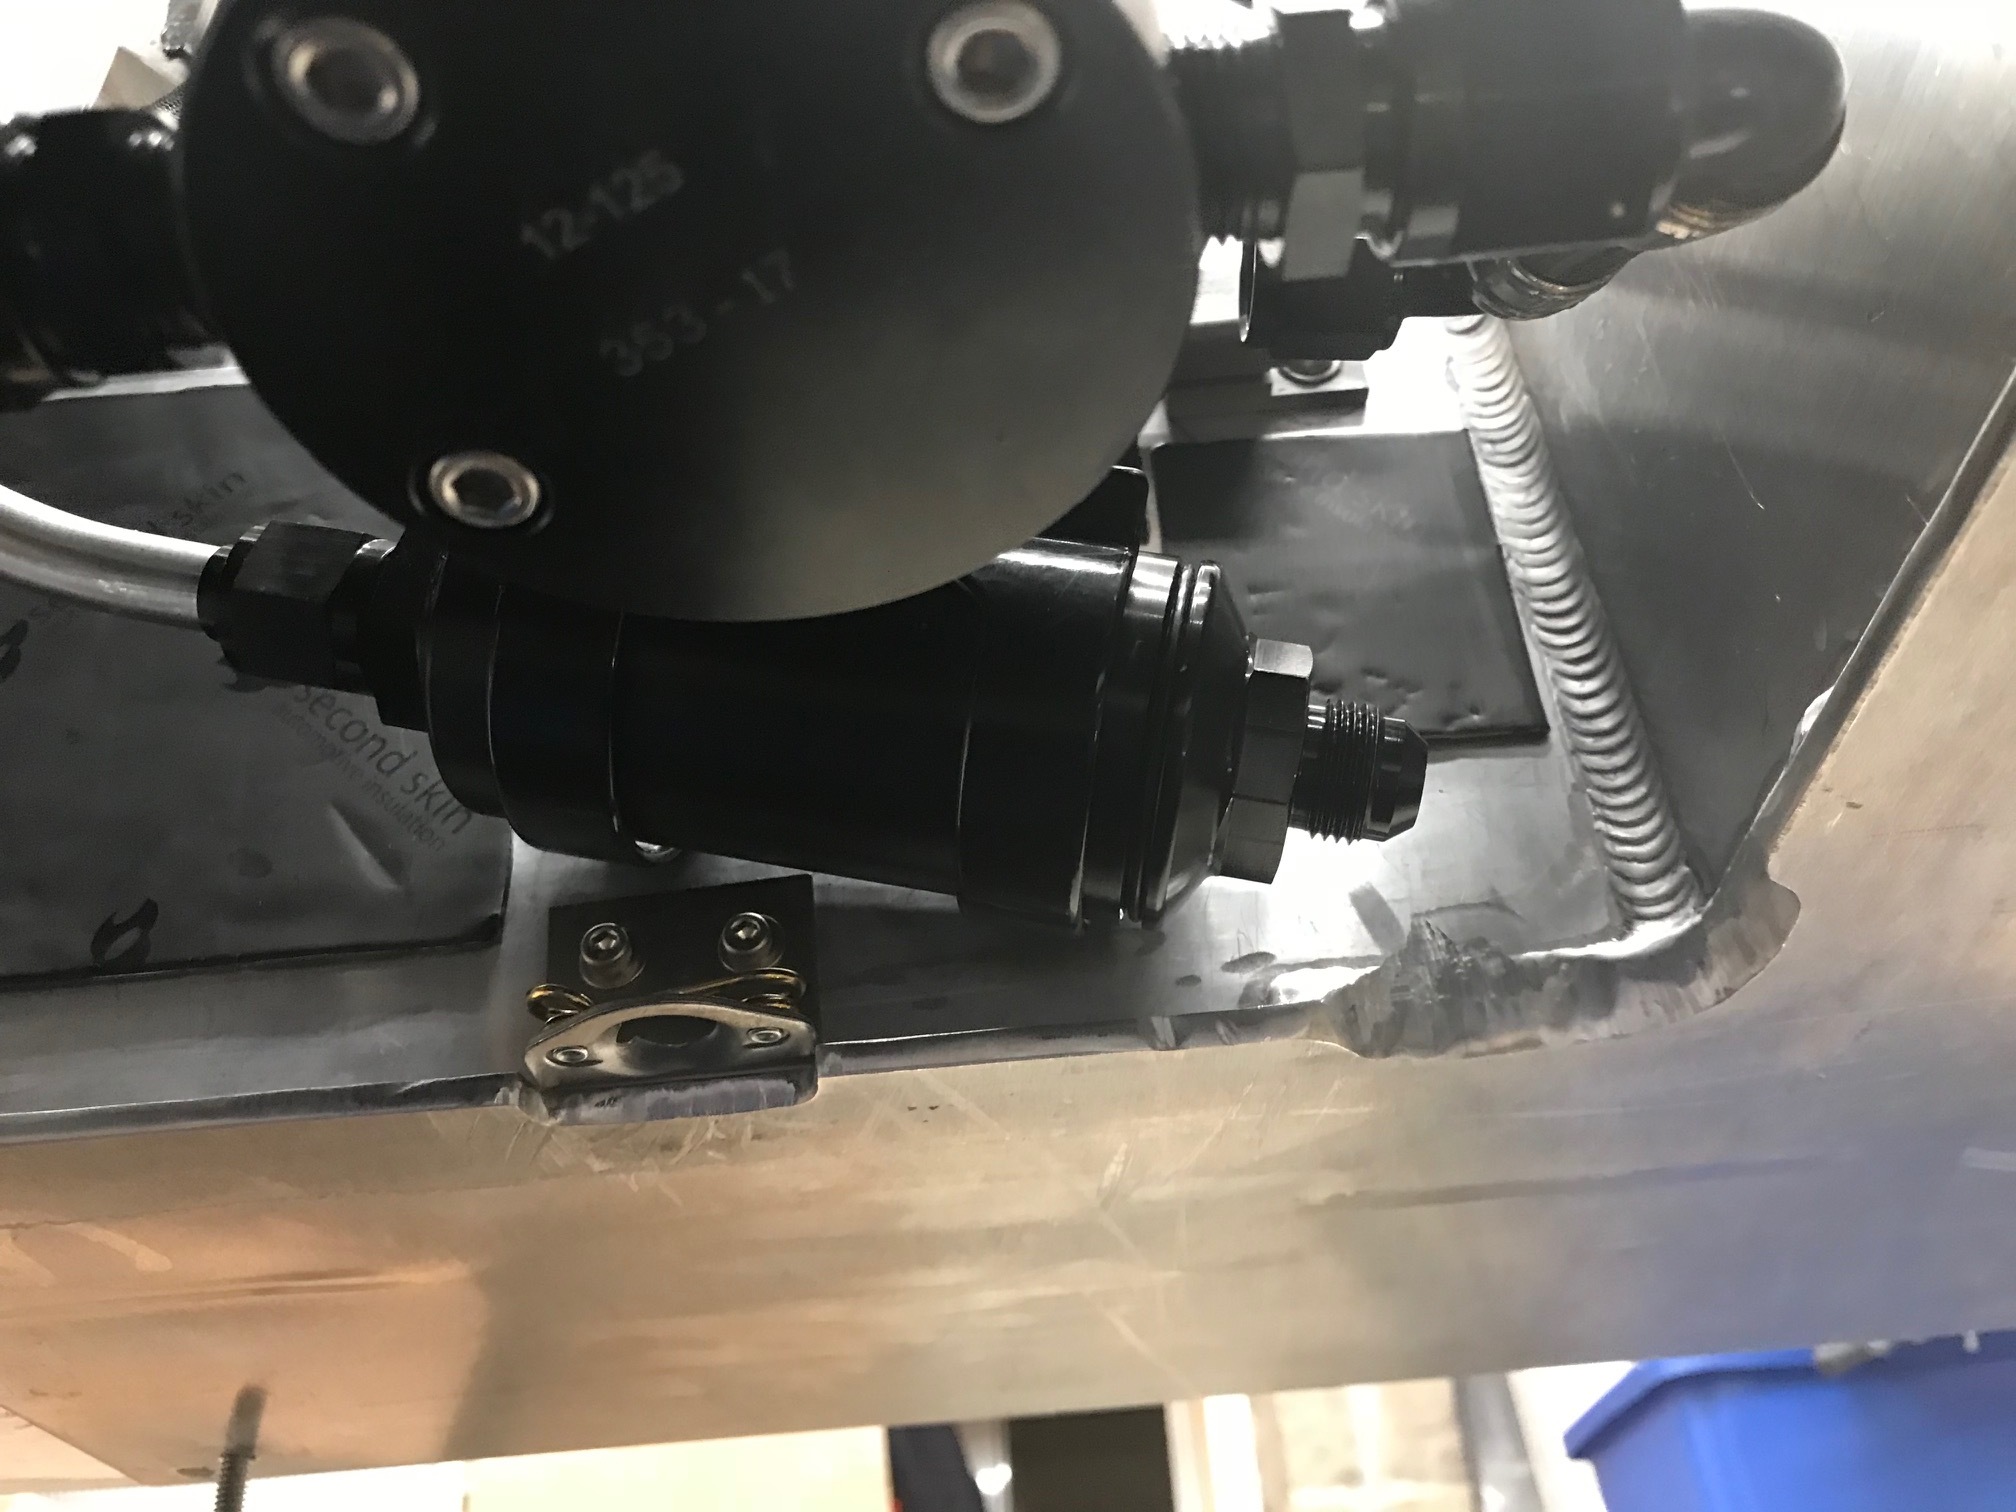
Fuel Pump and Bracket
The fuel pump bracket was made with 1/4" x 4" x 4" angle aluminum. I milled a rectangular opening and drilled a circular one to reduce weight. I also designed and printed a spacer because the pump was too tall for the bracket (a 5" piece would have obviated the need for this). While the pump's mount is coated in rubber, I also created a 1/16" rubber gasket to go under the spacer to further improve vibration isolation.

Hard Line
It was too tight to get the flex hoses to make the bend between the shutoff valve and the filter so I made a custom "hard line" out of 1/2" aluminum tube. Fortunately I only needed a single 90-degree bend which is a simple to do with a tube bender. I then needed to put a single 37-degree flare on each end of the tube. It took a couple of tries to get it right but it came out perfect. On my second attempt I had the perfect length, perfect bend and perfect flares, but I forgot to put the tube sleeve and tube nut on BEFORE making the flare – Do'h, another do over. Here's the top-level steps:


Access panel
I decided to cut a hole in the floor for an access hole. The first step was to lay out the opening from the inside of the car. I maximized the opening, but I left a 1/4" lip to clear the weld beads (they're really hard and not fun to cut or drill). I used a 1" diameter annular cutter to drill the four corners from inside the car. I then used a jigsaw to cut the hole from the underside of the car.
The removable panel was made from 0.1” x 12.25” x 8.5” aluminum. To make it easy to remove/install the panel, I decided to use Dzus connectors. Rather than attempt to cut the Dzus profile and holes in the floor I used pre-made Dzus weld plate spring receptacles. Since you can't weld steel to aluminum I simply drilled and tapped the chassis for screws to fasten them. To make up the space between the panel and the fastener I designed and 3D printed some spacers. The spring heights were a little off, so I used a spring height adjust tool below to stretch them a little. This is a lot better than doing it with needle nose pliers.


I wanted to be able to replace the filter element and only need to disconnect one hose connection (rather than disconnecting both ends of the filter and removing the entire assembly). To accomplish this, I tilted the filter bracket downward and ground off the 1/4" lip on the floor so that the filter would clear. WOW, did that make a mess. I had metal chips everywhere. It's a close fit, but it works.

Fuel Shut-Off Valve
I wanted the fuel shut-off valve to be accessible from the engine compartment. To do that, I needed to extend the shaft so that it would pass through the close out panel. I bought a valve from Peterson which is beautifully machined. However, I really didn't like how they implemented the full-open and full-closed stops. When the handle isn't attached, the shaft can be continuously rotated in either direction. As you can see in the picture below, a screw is used to tighten the handle on a round shaft. The full-stop positions are implemented via a fixed pin on the housing which fits into a slot that's machined into the handle. If the handle slips the full-stop positions will be off. While not the end of the world, I went to a lot of trouble to have no restrictions and there is no easy way to know if things are lined up (i.e., full open) once installed.
There must be a better solution. After doing research, I found one from Speedflow. It's not as cool as Peterson's, but the stops are cast into the body and it has a hex shaft which prevents the handle from rotationally slipping. I loosened the screw and was surprised that I couldn't remove the handle. This is because the screw passes through a groove in the shaft. The only way to remove the handle is to remove the screw which is another nice design feature. Extending the shaft was easy using a hex coupler and a cut down 3/16" hex wrench.
I designed and 3D printed a two-piece cover plate. It prevents any fumes from passing through the closeout panel and any lateral force from being applied to the valve. Oh yeah.... and it it also hides the off-center hole that I drilled


Flex Lines & Bulkhead Fittings
My new best friend
I raved over how great aramid-braided PFTE hose and fittings were in my Bullet Proof Hose post. I still really like that stuff, but Abe brought over his hydraulic crimper, a bunch of XRP hose and bags of XRP crimp fittings. You simply cut the hose with a single snip (no mess, no fraying), slide the end on, orient it the way you want, crimp it and use a micrometer to ensure that the OD is within range. Wow, that's easy. The crimp-style hose ends are smaller and lighter than the reusable AN fittings. In addition, since the crimper applies 35 tons of pressure, it creates a superior connection,. .
Problem is that the machine costs several thousand dollars and you need a die, which costs hundreds of dollars, for every size fitting. So Abe's my new best friend;-)
The last step was to install the lines for the fuel out, fuel in and fuel tank vent. The filter element is trivial to service and everything is serviceable. I also added heat shrink tubing and Deutsch connector to the fuel pump.
