
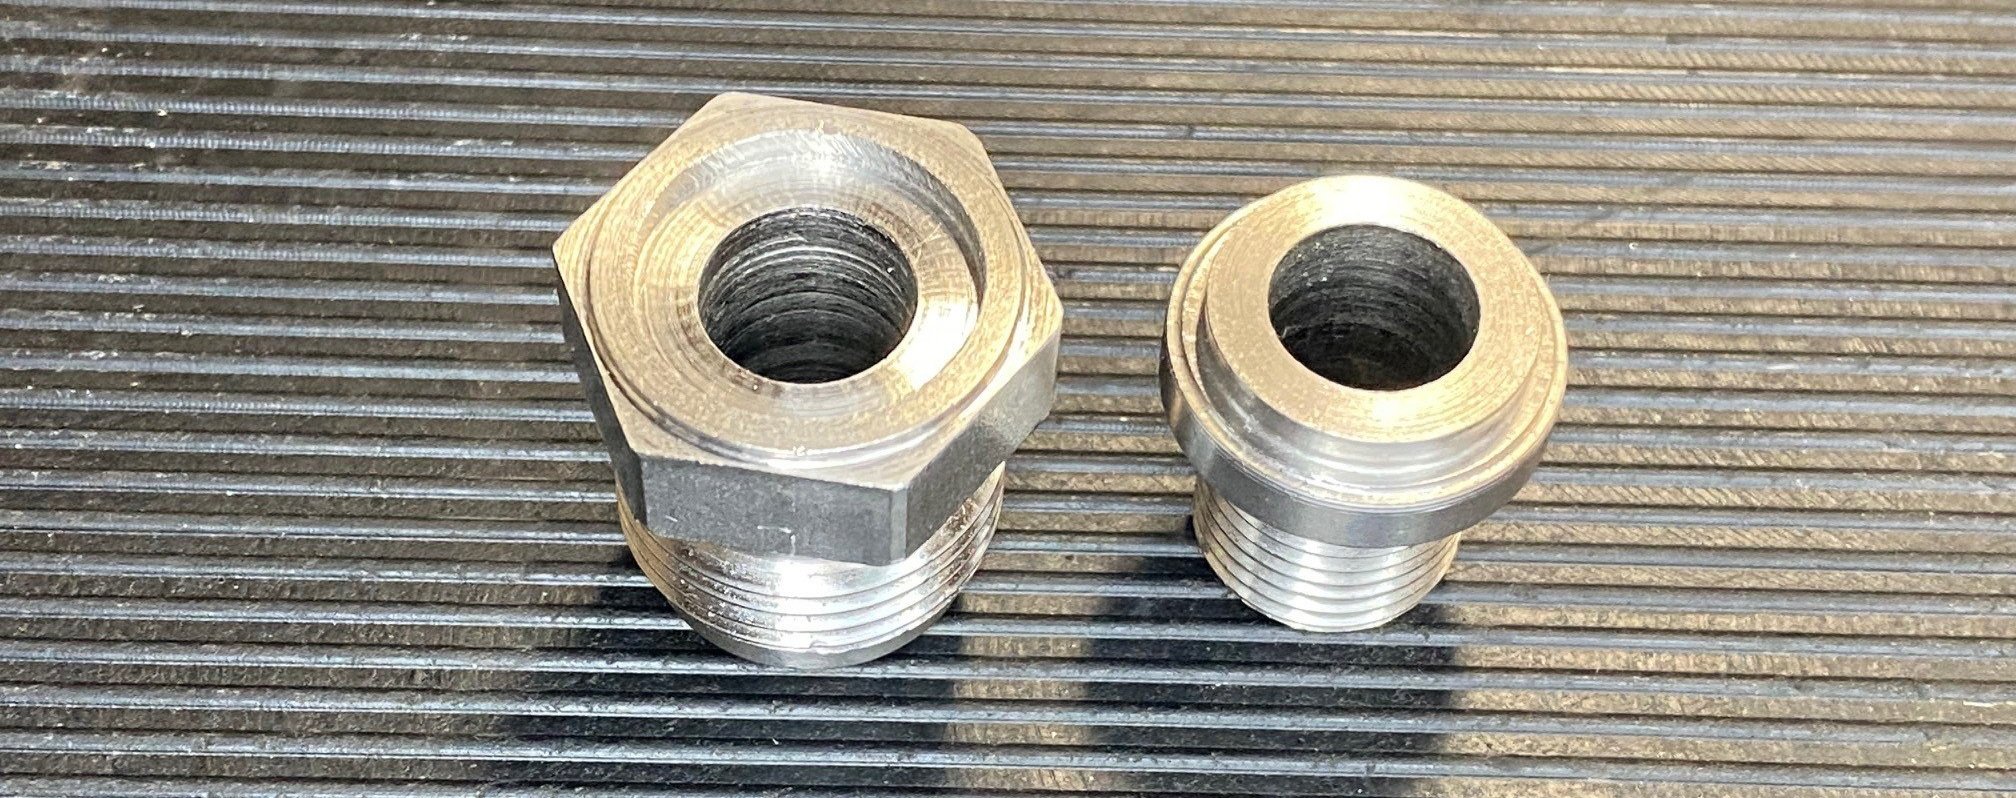
LS engine oil inlet fittings; Daily Engineering (left) and Kurt Urbane (right)
In a previous post I replaced the oil inlet fitting that came with the Daily Engineering dry sump pan with one from Kurt Urbane. I went from colliding with the merge collector to having about 1/4” of clearance. Do’h! That’s too close.
The only solution was to shorten one of them on the lathe. The Kurt Urbane was a better starting point because the hex diameter (i.e., what you wrench on) was smaller, 0.932” rather than 1”, which provides better block clearance, and it has more threads into the block which means that it’s less likely to leak. That said the hex was taller so the first step was to turn it down from 0.366” to 0.311.” I then used a cutoff/parting tool to split the part into two pieces.
I wanted the two pieces to interlock to ensure that concentricity was maintained during welding. Machining the male side was easy to figure out, but I was confused about the female side — some things never change LOL. I’ve done basic boring operations before, but I wasn’t confident that I could achieve the tolerance that I wanted with a perfectly square inside corner. I then figured out that I could load an end mill in the tailstock and do a simple plunge cut. After some consideration I ordered an 11/16” center cutting, 4-flute, square end mill. What I didn’t think about was that its shaft size was 5/8.” The R8 collets for my mill go up to 7/8,” but the Jacob’s chuck in the lathe’s tailstock only goes to 1/2”. So I returned the end mill and purchased one with a 1/2” shank. Despite that setback the second end mill worked great and I got to use the tailstock’s DRO for the first time.

Rod (left/red) pressing part onto the live center (right) to ensure concentricity; and no it wasn’t concentric when I took the picture!
The male side involved a simple turning operation, but setting it up wasn’t as easy as I thought it would be. I could only put 0.1” in the chuck and I couldn’t get the part concentric within the jaw. After some research I figured out that I could put a live center in the tail stock and then push the part onto the live center using a long rod through the backside of the spindle. It would have been nice to leave the live center in place, but there was it was in the way of the cross slide so it had to be removed. I was able to get the part concentric, but after taking a bit of material off I realized that there was too little material for the chuck to grab.
Since the part was made of stainless steel, I lightly grabbed the threads with the chuck and only turned 0.005” (0.010” total) per pass. That worked well and there was no damage to the threads.
The parts were fixtured by running a bolt through the center with two washers and a hex nut. Since the parts were self indexing there was no need to worry about alignment. The parts where then TIG welded.
Female (left) and male (right) pieces ready to weld

Daily Engineering fitting (left) and Shortened Kurt Urbane fitting (right)
I’m going to have to pull the engine and remove the headers to see if it all works. I think that I might need to modify a socket to clear the block and perhaps grind the block a bit. Time will tell.